

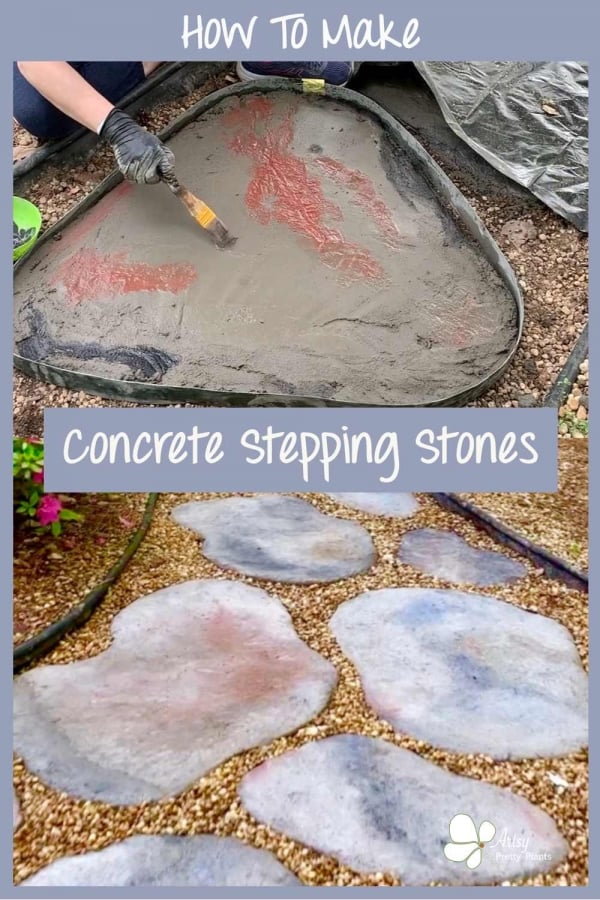
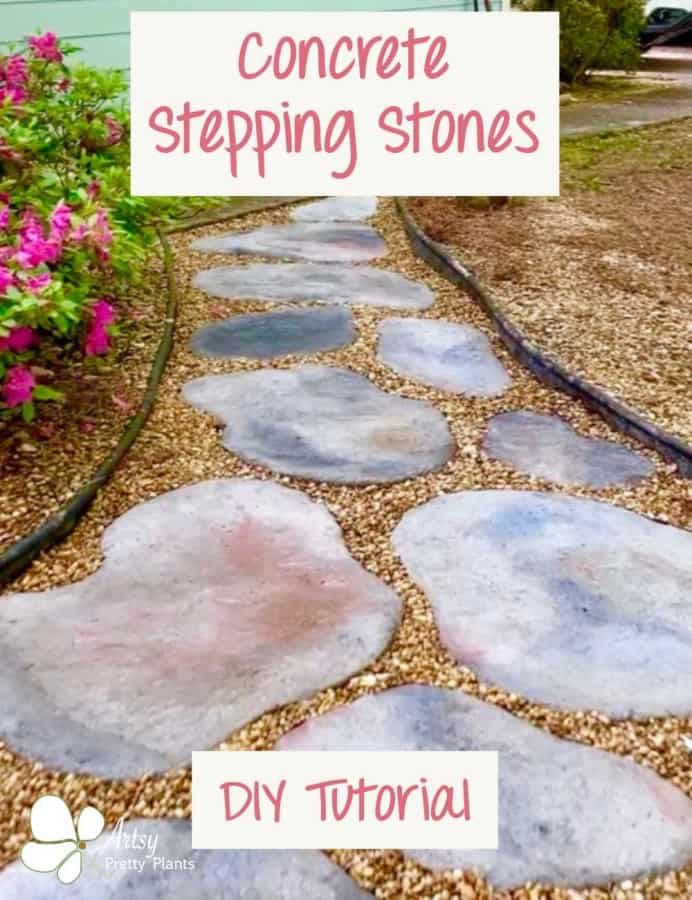
How To Make Exposed Aggregate Stepping Stones
Make natural looking DIY concrete stepping stones or pavers. Color the physical and mold it into the shape of real fieldstones or flagstones.
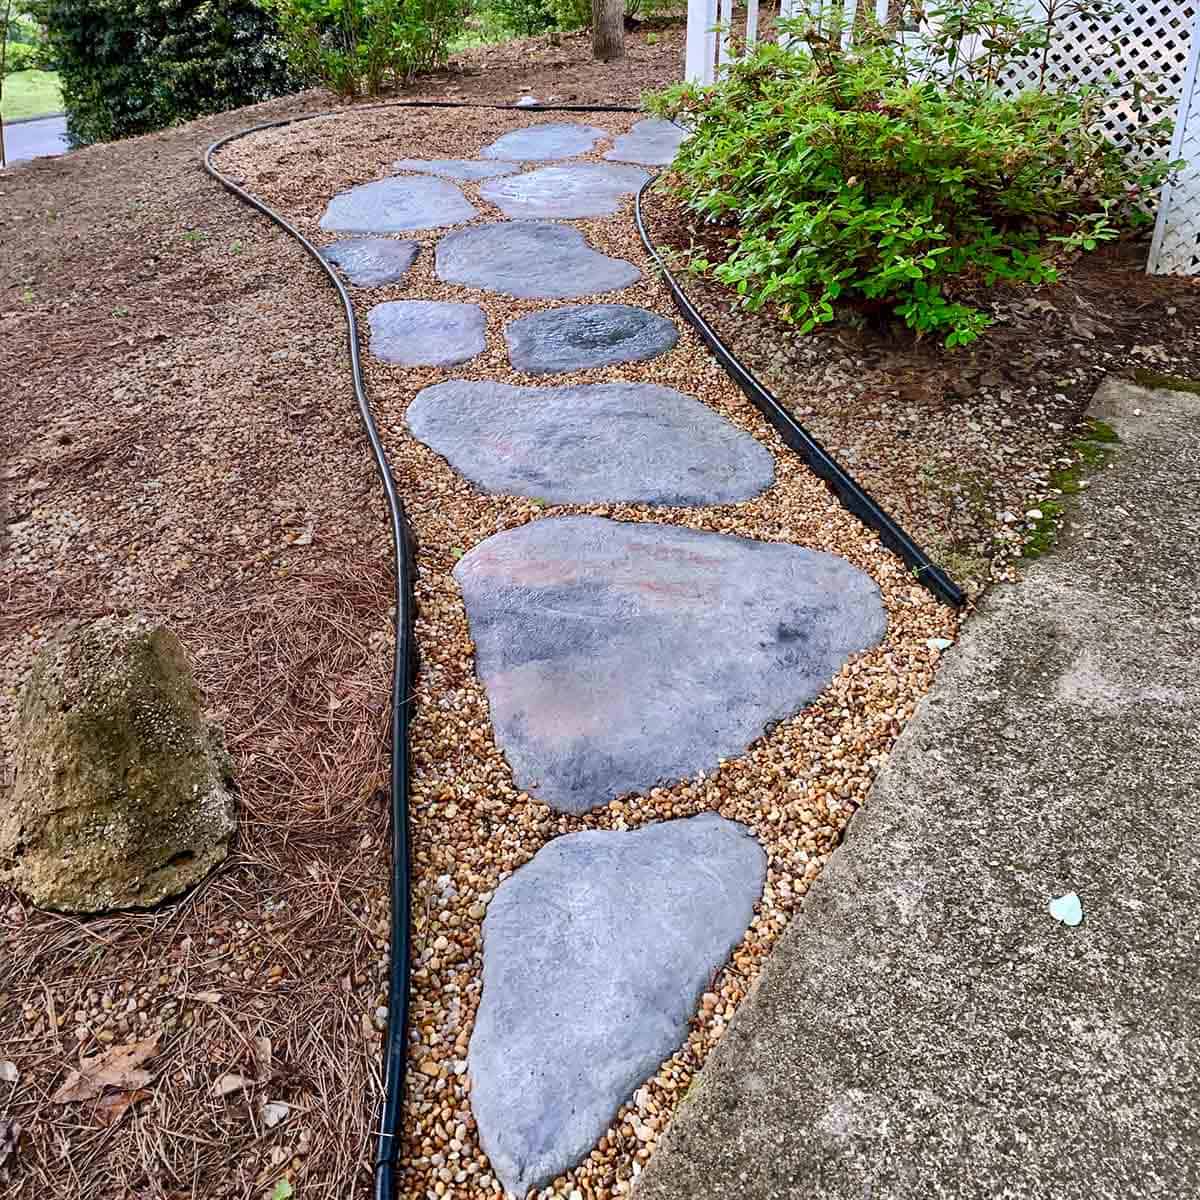
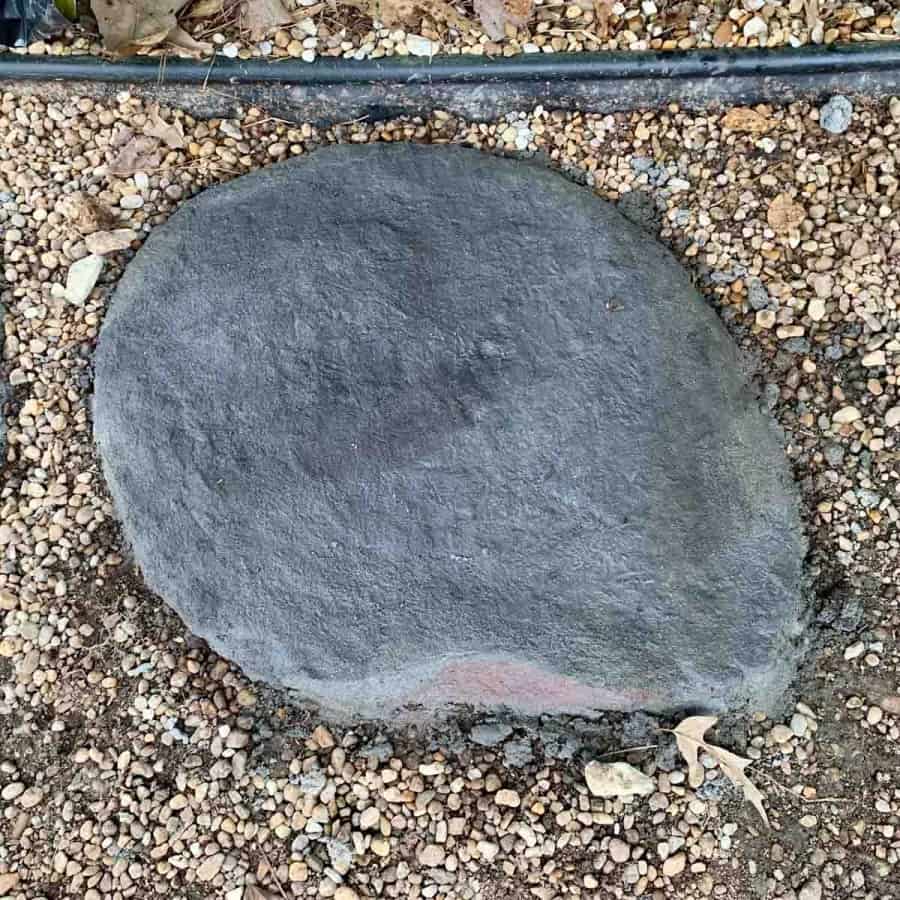
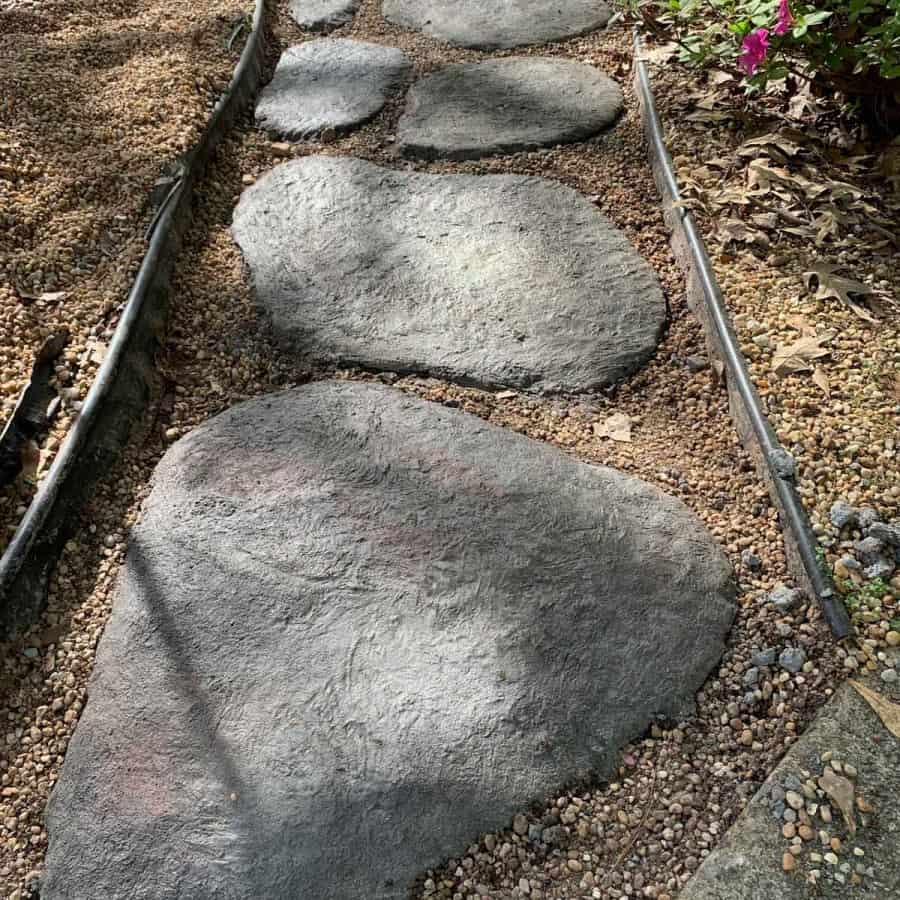
Finally, the DIY physical stepping stones are finished!
It's a projection I wanted to do last year because when we moved into this rental abode, we quickly decided that we wouldn't use the forepart door to go in and out of the house. Why?
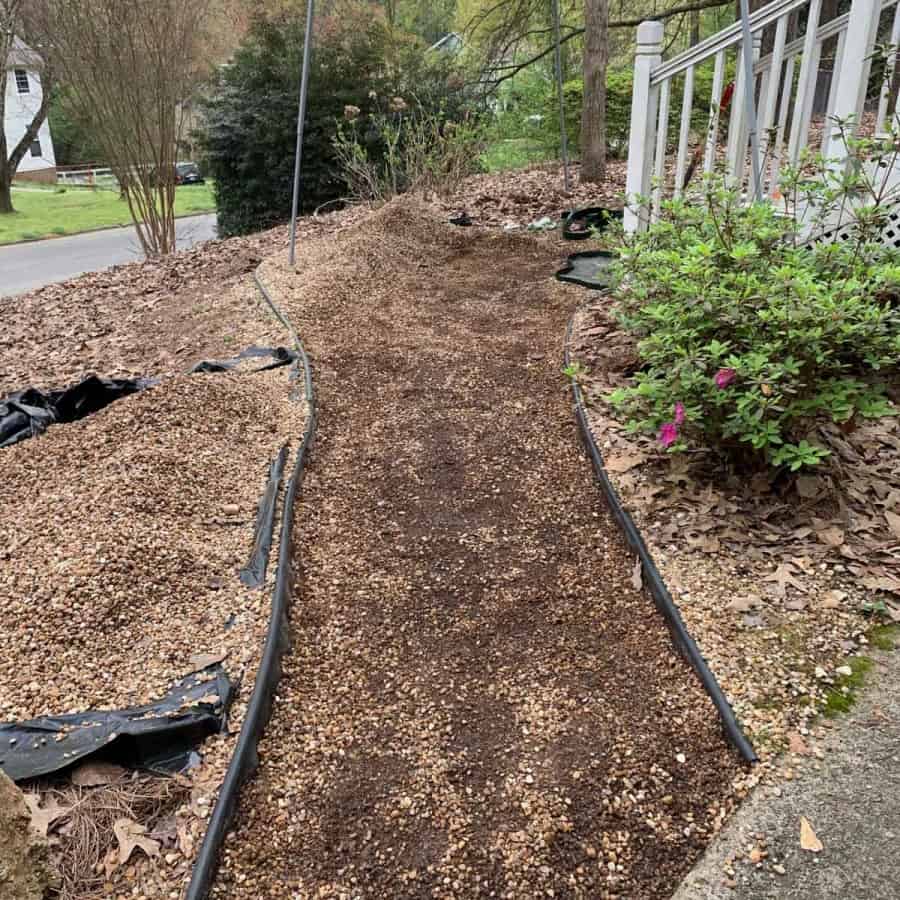
Because the existing path from the driveway to the door was 6" deep with pebbles.
To walk on it, I kid you not, this so-called stone path was like trudging through quicksand or fifty-fifty similar walking in deep water.
Someone didn't accept their thinking cap on when they fabricated that path. ;0) We truly needed functional stepping stones.
Now if you lot aren't looking to brand your own concrete stones, then you may want to bank check out my post how to build a physical paver patio, where I purchased the pavers.
In the paver patio situation, information technology was cheaper to buy than to make.
Stepping stones are sometimes referred to as garden stones, paving stones, or pathway stones.
Regardless of the term, they have one important objective –to help go you lot from spot A to spot B.
Also, here are 15 other ideas on different types of garden paths and walkways you tin make.
Video For How to Make Concrete Stepping Stones That Look Like Natural Rock
Please click the push to subscribe to my YouTube aqueduct and be notified when I have a new video tutorial!
So I decided I'd make stepping stones that would look like existent fieldstone, using concrete of course.
It'due south much cheaper to make your own stepping stones using physical than it is to buy stepping stones, especially if yous have them installed.
Making my own concrete stepping stones and choosing a pour-in-place method required less prep work with the ground because the concrete is self-leveling.
If yous make a concrete stepping stone mold so install them separately you're going to have to level the footing start.
This is considering the lesser of the mold would have been flat.
This pour-in-place method saved me quite a bit of time and labor –specially considering how large these concrete stepping stones were.
You'll still have to level the top of them, merely it may non exist necessary for you to exercise annihilation to level the ground beforehand.
Past the way, if y'all're looking for a quick and like shooting fish in a barrel project, you may want to check out this tutorial for a stained glass tile mosaic stepping stone.
The All-time Type Of Concrete Mix To Use For Making DIY Stepping Stones
The best blazon of physical mix to apply for stepping stones is going to depend on the thickness you are making them.
I made these stepping stones 2″ thick and then I went with Quikrete's Sand Topping Mix.
If your stones are thicker, and then this is not the proper mix for you lot –as Quikrete specifies only for thickness of up to 2″.
Only be sure to read the labels and always stick within the recommended thicknesses.
Just Don't I Demand Reinforcement For Physical Stepping Stones?
Quikrete'southward Sand Topping Mix doesn't need to be reinforced as long as you don't go over the ii″ thickness. It does not need craven wire, wire mesh, nor rebar.
I verified this with Quikrete's client service department before starting the project.
The cement itself is potent enough to hold up, even under freezing conditions.
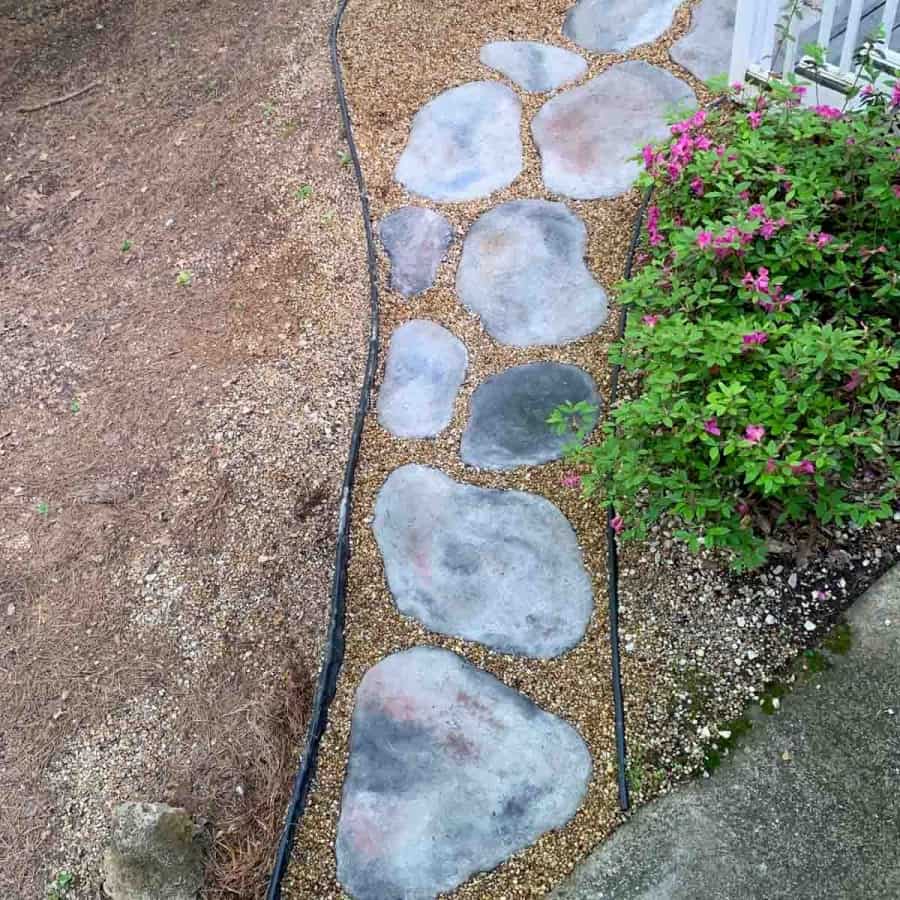
UPDATE i ½ years later : The physical stepping stones take held up and look equally good due south when I beginning made them, except for a slight lightening and staining from foliage debris.
Of course, you don't take to make physical stepping stones that look natural.
You can follow much of this tutorial and make regular round stones, using the same stepping stone mold I used for these.
As well, many people similar to make decorative stepping stones like garden mosaic stepping stones.
They are usually made past adding mosaic drinking glass or other embeddable materials into the physical.
If yous're not convinced about making your own stepping stones, and so cheque out my article discussing all the pros and cons of making stepping stones vs. buying them and having them installed.
I can say this has been my favorite DIY to engagement because of how amazingly practical the stepping stones turned out to be for us.
And using the materials we did, actually concluded up being the piece of cake way to brand these.
I've got a lot of information here because I actually go into a lot of details, but don't let the length of this tutorial intimidate yous, it is a fairly easy project and parts of information technology are especially fun.
Some of the links on this page have been provided as a convenience for finding materials. These links may besides be chapter links. Equally an Amazon Associate I earn from qualifying purchases, at no extra cost to y'all.
I simply recommend products I've used and loved, unless otherwise stated. Click here to read my full disclosure policy.

DIY Difficulty Level | Moderate
The techniques are actually quite easy, but since the physical is heavy to bargain with, and this project will require a lot of crouching and squatting on the ground.
Due to the physicality of information technology I'm rating this project equally moderate.
Materials For Making DIY Concrete Stepping Stones
- *Sand Topping Mix – I used (7) 60lb numberless- run into Materials Details below
- Dust mask
- Fabric pegs/stakes
- Vinyl furniture strapping or vertical vinyl blind slats
- Large mixing bin or wheelbarrow
- Trowel
- Hoe
- Black, red and blue colorant
- Xanthous or blue record
- Mask
- Coarse paintbrush – one″ or ii″
- Disposable cups or bowls
- Plastic bags
- Safe gloves or durable nitrile gloves
- Work gloves
- Sealer –optional simply recommended
- Wheelbarrow –if you have one (for carrying the concrete to the stone location)
*Reminder –In add-on to reading the tutorial, I highly recommend watching my diy concrete stepping stones video before you make these.
Some of the steps and techniques I used, peculiarly for molding and coloring are a chip hard to explain in writing and even photos.
Use this written tutorial as a supplement to the video.
Information On Stepping Stones Thickness When Using Physical: Size And Quantity Needed
You'll need to figure out how much mix you will need for your concrete stepping stones projection.
I used Quikrete's online calculator earlier the project, simply it didn't end up existence accurate, so the reckoner is probably worth skipping- I've linked to it merely in case yous are curious.
To simplify my quantities, I figured I had the equivalent of 9 big stepping stones.
Technically I had 5 large concrete stepping stones, only if I combined the pocket-size ones together, I could see that they would take fabricated 9 large ones.
Past "large", I mean approximately iii' x 2' and they were approximately 2" thick.
Each stone used a little less than a total purse, and I recall the existing pebbles that were already in the basis took upwardly some of the space.
So information technology'due south possible I needed slightly less physical mix than you may demand at the same size.
It's safe to calculate 1 bag per large 3' x ii' diy concrete stepping stone.
So how practice you know how many stones y'all will need for your called path location?
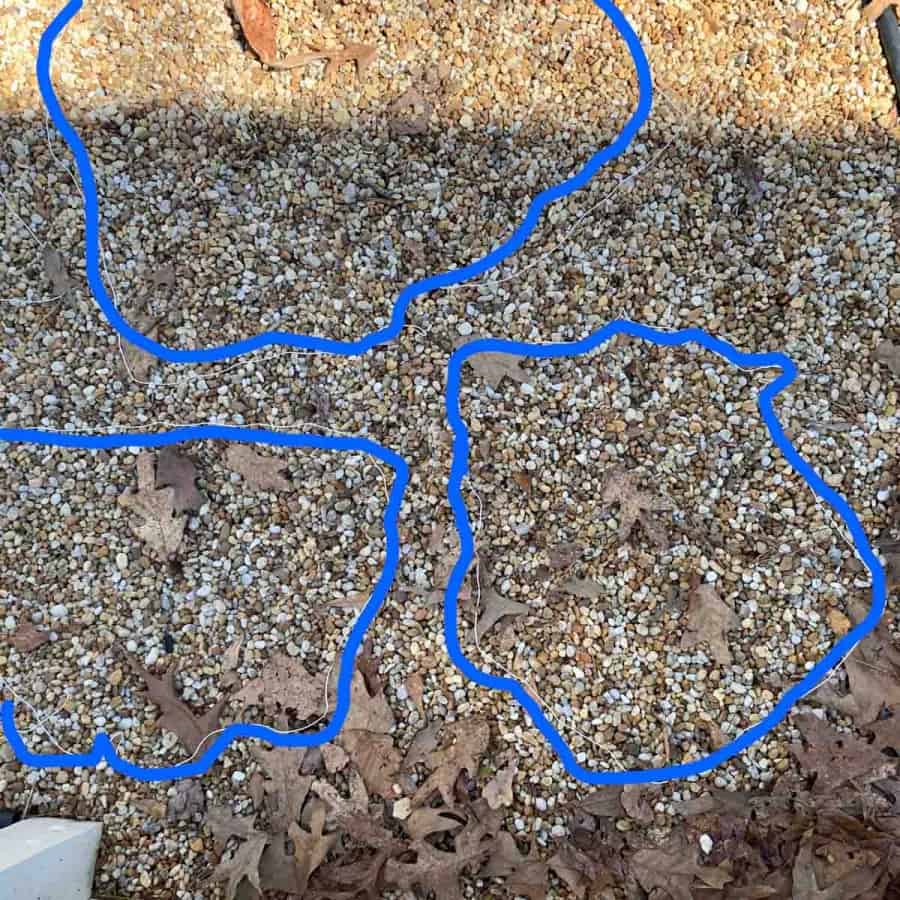
First I sketched out how I wanted them to look. Then I was able to go a pretty skilful idea by using ropes as temporary molds.
I placed pieces of rope onto the path and wrapped the rope into the shapes and sizes I planned my stones to be.
These basically acted as templates.
This method fabricated it easy to see that I would have a mix of 5 large stones and several small stones –over again, which if combined, would make 9 large stepping stones.
Hint: If you purchase the bags of concrete mix through a big box store, they are returnable. So I recommend buying i more handbag than you retrieve you'll need.
The Best Mold To Employ For Stepping Stones
For making my reusable concrete mold, I used vinyl chair strapping.
These straps are replacement straps that are used to repair vinyl strap outdoor chairs.
Nonetheless, in that location may be a cheaper alternative, such every bit vertical vinyl blinds slats.
With my vinyl straps, I was limited to making merely three molds at a time.
Nevertheless, since the concrete sets in an hour, it would accept been physically hard to work on more than iii at a time, then the three molds sufficed.
As well, you lot'll see in the tutorial steps that y'all should actually exist able to remove the straps after nigh 10-20 minutes and move on to making the next stepping rock.
All in all, these straps worked out great because of how hands you could mold it into unlike shapes.

Information On Coloring Concrete Pathway Stones To Wait Natural
My chief goal with these stones was to make them expect merely like actual stepping stones. I wanted the shape to look natural, too as the coloring –mostly like real fieldstones.
Fieldstones come in many sizes, shapes and colors, so what is natural looking to me, may not be natural looking to you.
You may want to do a Google image search on fieldstones or flagstones to see which ones float your gunkhole.
When it comes to colour, it'due south important to know that this Sand Topping Mix cures to a frosted stake grey –almost a frosted white.
I actually included this Sand Topping Mix in the Cement Tests post where I compared the colors of various cement mixes.
Even in my tests, the concrete cured to a frosty greyness/white.
But for some reason, when I made these concrete stepping stones, I didn't retrieve the color of the pavers would turn out light –like the basin in my tests did.
Here are another tutorials where I added color to physical –Pink Cement Planter using a powdered pigment and Mini Cement Airship Planters using a liquid colorant.
For this ane I used a marbling technique with acrylic paint –Fall DIY Concrete Pillar Candle Holders.
This was the shade of grayness I had intended on.
I must accept thought that mayhap because the stones were and then large, they would naturally plough out a more medium grey.
I was incorrect. Just be aware that when the cement is wet, information technology looks quite night, simply volition cure to quite a calorie-free shade of grey that almost looks white.
And then to avoid having any surprises with color, I strongly recommend that you make ii test pieces before starting this stepping stones project.
You don't need to use your vinyl straps, just plop your wet mixture onto the basis where your stones will go and make them into any shape.
Make i test piece that is approximately i'x1' and two" deep.
Test the coloring by brushing the colorant on top of i side of the colorant and leave the other side natural for comparison.
On the second test stone- this 1 can exist 6 x vi" and two" deep, only add charcoal colorant into the mix –rather than brushing it on.
This will give y'all a sense of how the techniques work and whether you lot need to adjust the amount of colorant. For a 6 x 6" piece, half a tablespoon (if using the liquid colorant) should be your starting point.
Delight refer to Steps 4-6 for instructions on coloring to brand the exam pieces.
Let these test pieces cure a minimum of 3 days –a calendar week is amend. This will show yous what you have to work with.
Y'all don't desire to terminate upward having to buy expensive stains or dyes, forth with etching products and sealants, to correct the color if the color isn't what you lot were going for.
This will salvage y'all time and money by doing some testing first.
Again, don't let this scare y'all from the project, the stones are easy to make and ridiculously fun to color.
Yous also will have enough of fourth dimension to conform the colour as you are working on them.
Really the outcome is but having an agreement of how much lighter they will look when fully cured.
Tutorial Steps For Making Concrete Stepping Stones
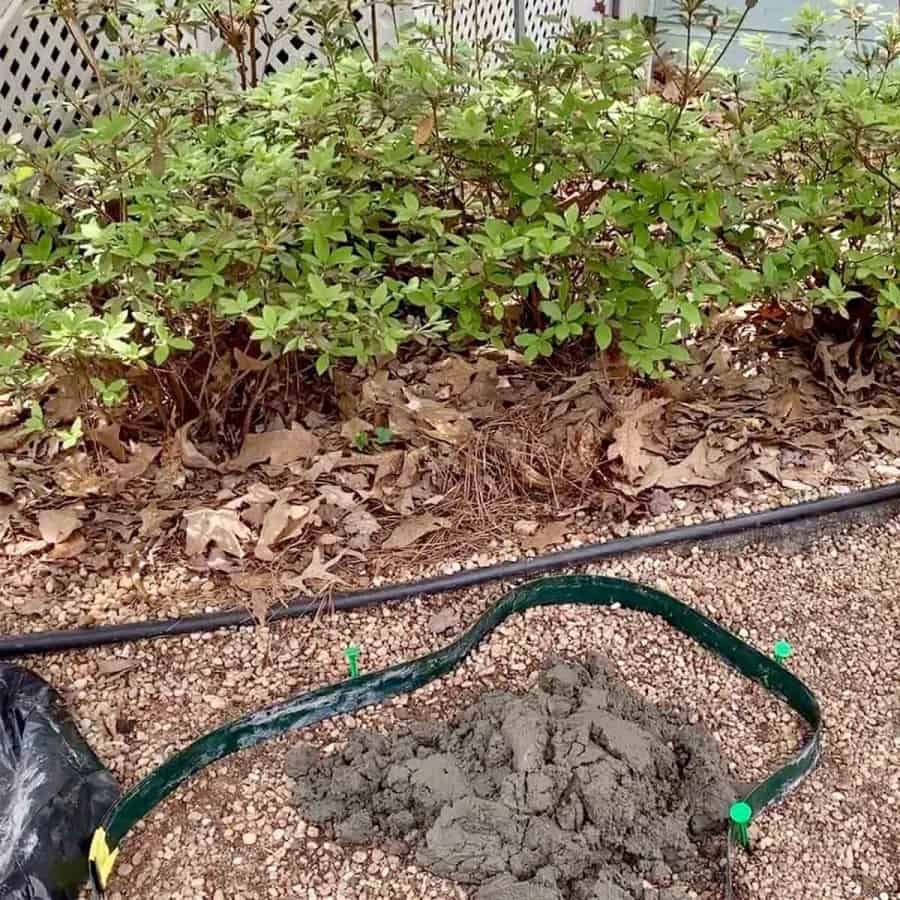
Step i. Prep The Space
Now that you have a skillful understanding of the coloring, you can prep the space.
I didn't take too much prep to practice for this path.
The path was already there only was covered in pebbles, so I shoveled all the loose pebbles out the areas I would exist placing the stones.
The ground was not in the least bit level, but I didn't worry about leveling because I knew the concrete would self-level to some extent.
Plus I didn't mind if they weren't perfectly level. Yous can always practice the leveling at the top of the concrete stones.
Step two. Put Together The Stepping Stone Mold
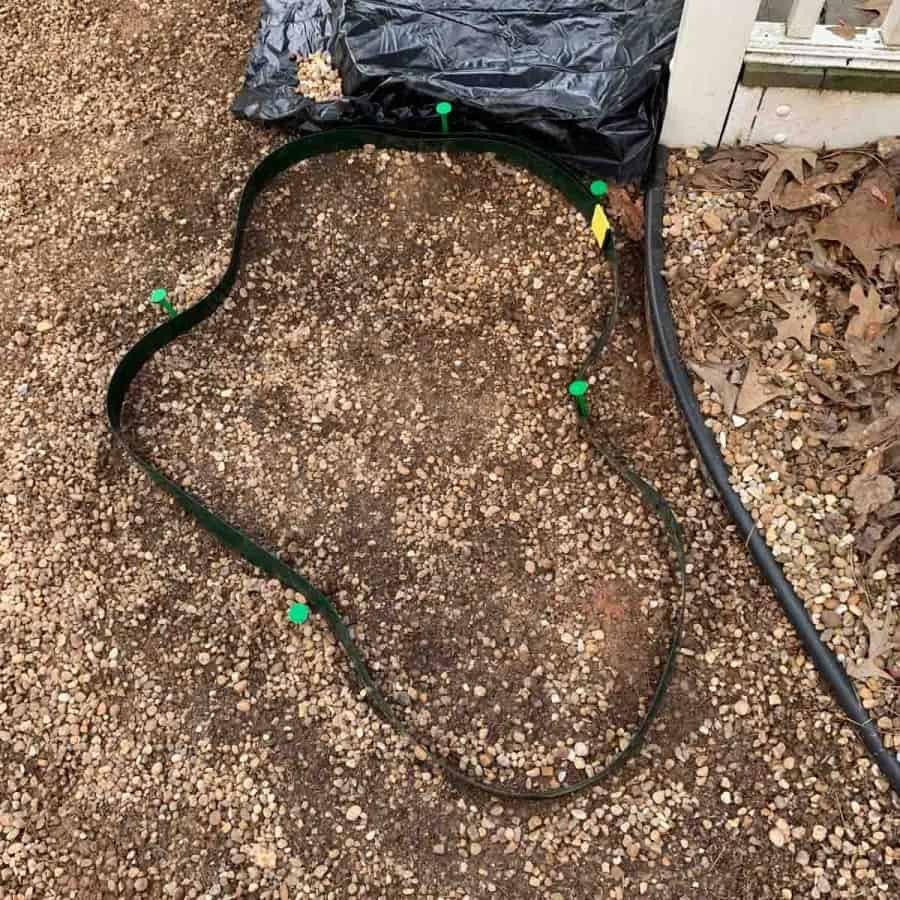
Use record to join the ends of the vinyl straps together.
Depending on the size, I sometimes overlapped the straps rather than butting the ends into each other.
Toward the end of my stone making, I skipped taping the ends together. The reason is that the mold held its shape without the tape.
This is because I was able to button some extra pebbles upward against the sides.
I even started pulling the mold off right away. It's upward to y'all and how comfortable you lot feel.
Accept the garden stakes and push them into the ground. Place them around the outside of your mold wherever you feel it needs support.
These are what you volition manipulate to get the general stone shape.
Step 3. Mix The Concrete
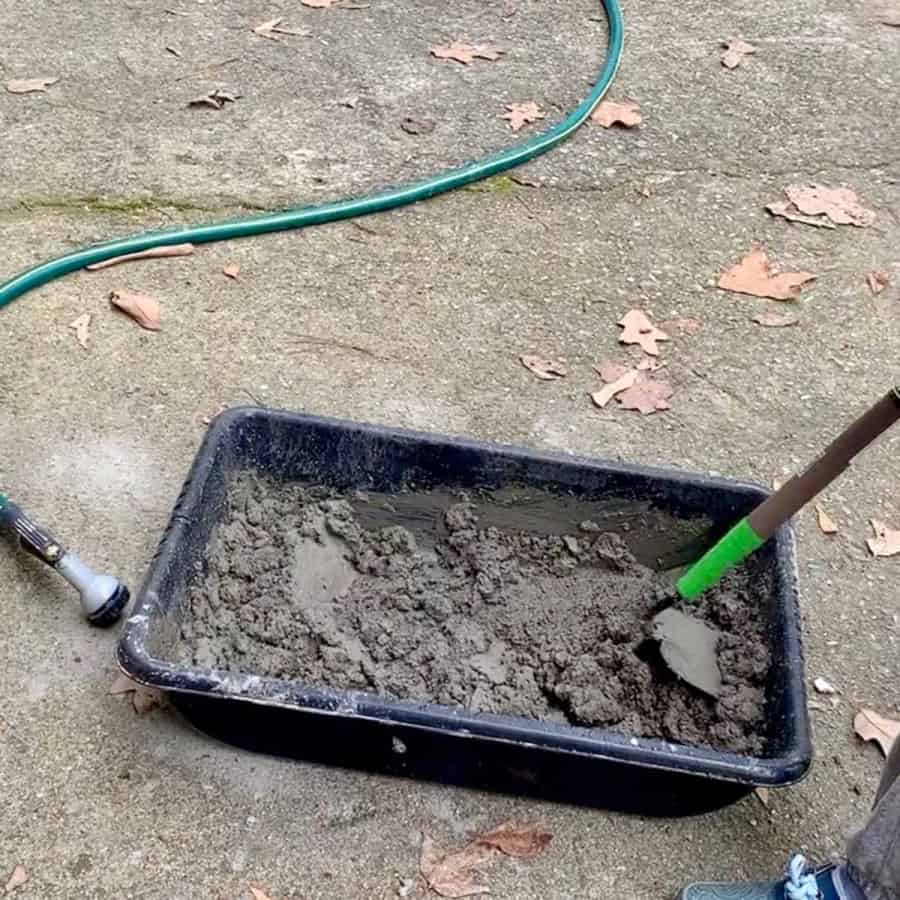
Using the hoe, mix the concrete with water. It will be easier and less dusty if you offset add some water to your mixing bin or wheelbarrow.
Then pour in the dry out physical mix –but do this in small batches.
If yous endeavor to do it all at in one case, it will brand information technology very difficult to mix in such a large amount.
Mix the concrete and arrange past calculation more than water or physical. The right consistency to aim for is a peanut butter-like consistency.
It will probably be easiest if you lot mix what you remember you'll demand for the whole stone, but separate a section that will be the top ½".
Simply don't color information technology yet, you'll practice this after the base layer is in place.
Step 4. Bandage The Concrete Stepping Rock Molds
My methods evolved over fourth dimension. I finally decided that only dumping the concrete into the mold was the best manner to go.
If this is easiest for yous then go alee and merely cascade it direct into the mold.
Otherwise, y'all might find it easier to utilise a shovel to place the concrete.
Just pour in the mix that is reserved for the one ½" base layer.
Spread the concrete around with your gloved hands start, and exist sure to become it right up to the strap edges.
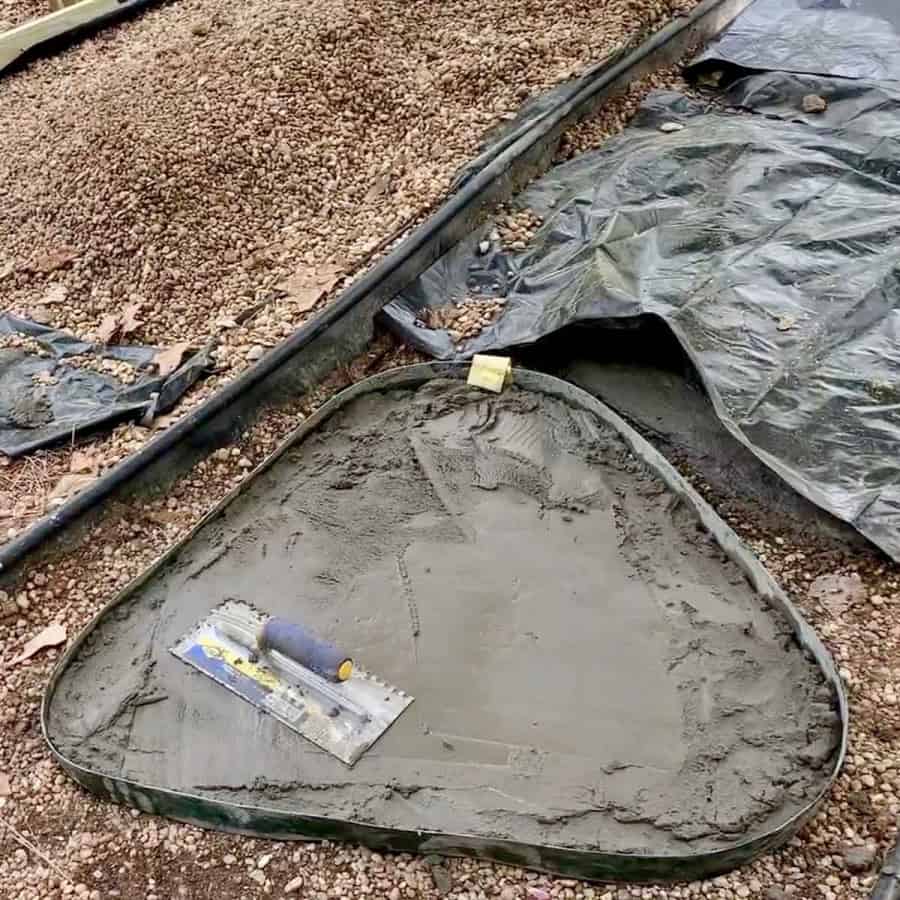
Adjacent, utilise the trowel to level the physical. Keep the trowel at a slight bending and just sweep information technology back and along.
Step v. Coloring The Base Layer
At present become ahead and add the charcoal colorant to the remaining mix y'all had separated and mix it in well.
The amount you add volition have been adamant from the ii pieces you tested before kickoff the projection.
Once the coloring looks even, pour it on top of the base layer.
Use the trowel over again to get it level and smooth. Concord off on applying the brush on color for at present.
Your timing will be more efficient if you start your next stepping stone.
Since I did most of this project by myself, I found it was easiest to go mix some other batch and gear up the next mold, pour it and lightly level it.
And then come up back to the previous mold and remove the strap.
The reason for my timing on this is because the concrete volition accept started setting and will be moldable enough. The set fourth dimension should be about xv-25 minutes.
Your workability time (the time before it becomes too difficult to mold or add colorant) for these stepping stones should be about an hour, depending on climate conditions.
Step half-dozen. Fine Tune The Shape And Prep For Emphasis Coloring The Concrete Stepping Stones
Later on you take started the adjacent rock mold, feel the concrete to run across if it has some class to it. If so, then remove the vinyl strap.
Now use your gloved manus to shape the edges. Round them a piddling, and push them inward to create more than of a curve if yous want.
You may also want to camber to the edge.
Now you will want the following supplies nearly the stone you are coloring.
Plastic bags; a coarse paintbrush; a small bucket of water; a rag for clean upwardly and diverse colorants of your choice, along with a bowl or cup for each.
In addition, for each color y'all have, you should likewise have one cup of water, plus y'all may observe information technology helpful to take one more actress cup of h2o.
Cascade some of each colorant into its own bowl/loving cup. If your pigment is a pulverisation, and so mix some water in with it.
Place the extra bowl/cup of water adjacent to each color.
Emphasis coloring the stones is kind of like painting watercolors, they crave lots of blending.
This is why you take extra cups of water. The small-scale bucket of water will be for cleaning upwardly the brush and your easily.
The main colors I used for this brush-on coloring technique were charcoal, red and a piddling blue.
Step 7. Artistic/Accent Coloring Of The Top Layer
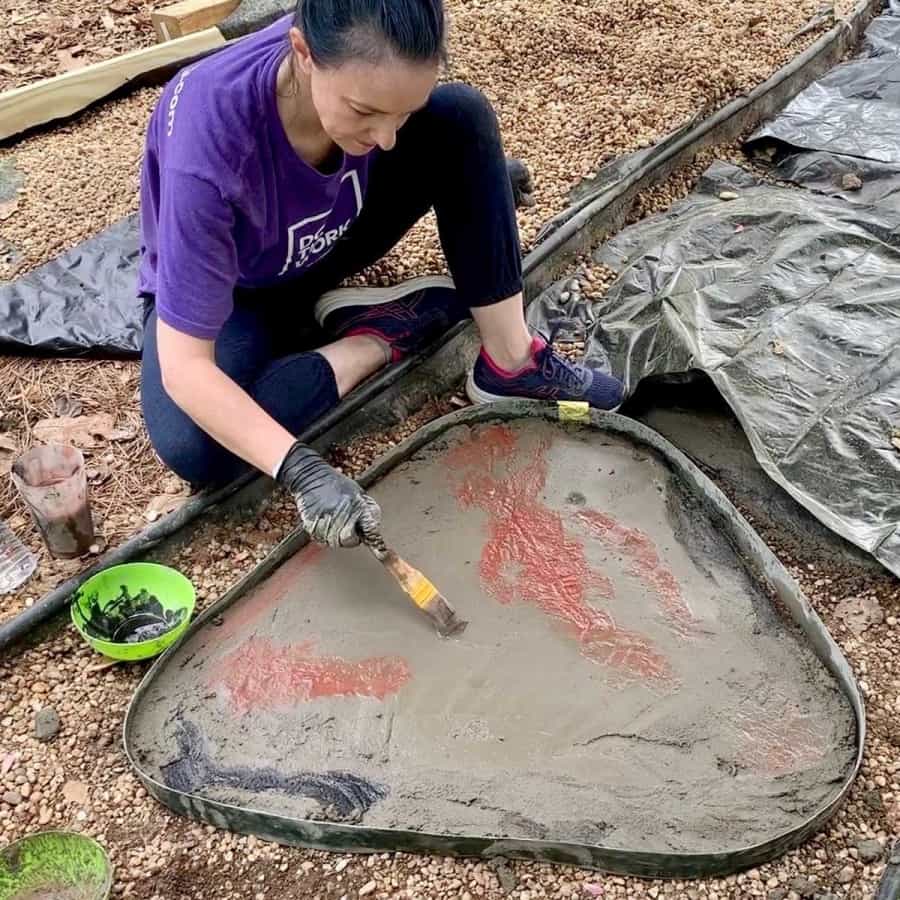
Take the coarse paintbrush and dip it into the outset color and then into the water.
Utilize this in a brushing movement to the stone where you lot want to add color. Blend it into the meridian layer of moisture cement and simply play with it.
If you are using crimson, so go lightly with information technology because it tends to be highly pigmented and you just need a little to become the color to come through.
Blend these colors into the stone and into each other the way you might with a watercolor painting.
Yous can dip your brush dorsum into the water to help with blending. Don't forget to get the edges.
Y'all can play with this by adding water to assistance mute the color.
Step 8. Add Rock Texture To The Concrete

Now yous will use the plastic bag to achieve two things, one is to blend the colors more and the other is to create the stone-like texture.
Place the bag on your hands and pat the tiptop of the physical. Keep patting until yous similar the way the texture and blending look.
The bag really concluded up being a great mode to get a nice rippled texture of natural stone into the wet cement.
Pace 9. Allow The Concrete Cure
Now continue these steps with the rest of the stones. Technically, the stones volition reach their full cure in 3-4 weeks- pregnant their full strength.
I was able to carefully walk on them after about 24 hours, but y'all should look iii-v days before you lot let whatsoever human foot traffic.
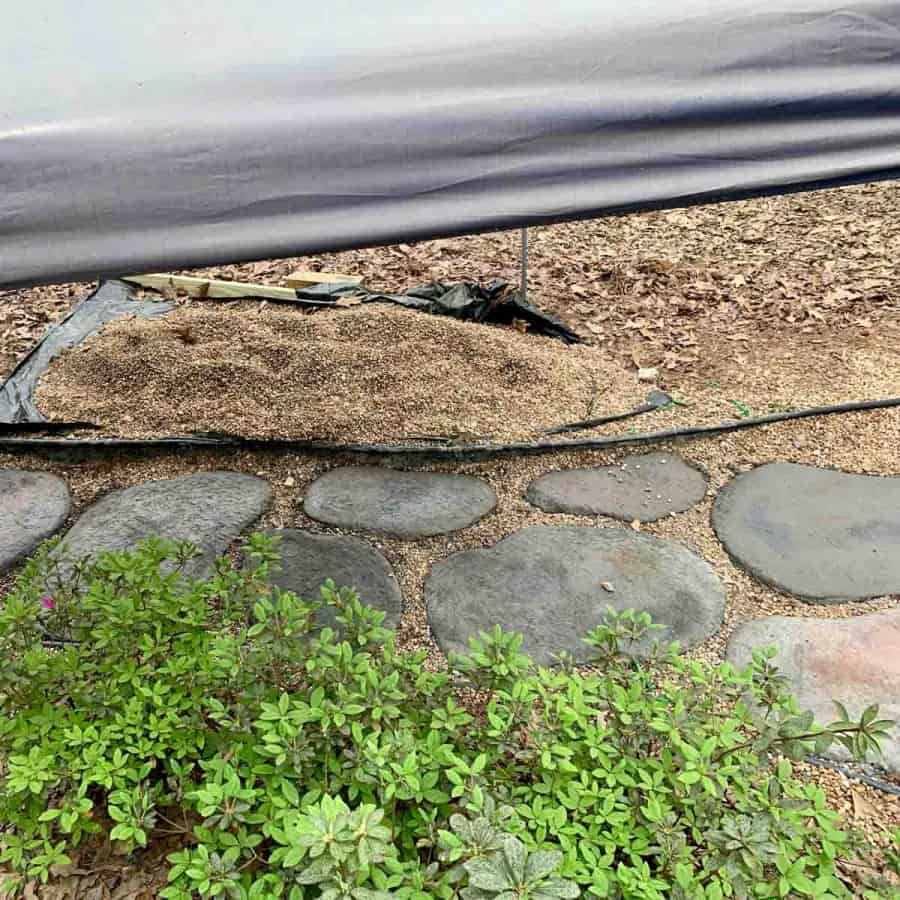
If you lot are wondering about needing to cover these with plastic while curing, per the concrete representative at Quikrete, it is not necessary.
You also do not need to water cure these.
I had my physical covered because it was the height of pollen flavor and I didn't want the xanthous pollen staining the stones.
I only left the plastic on for one solar day. They were dry enough that I wasn't worried about color permeating them.
For detailed information on how to colour/pigment concrete crafts, you lot may want to bank check out my Concrete Crafts Paint Tests article.
Y'all may too be interested in this post with 21 unique ideas on using rocks and stones in your landscape.
Footstep 10. Seal The Concrete Stones -Recommended
I didn't seal these -in part because I didn't want to add an extra expense for a home I don't own.
They are porous, so you will likely encounter staining if you don't seal them.
One month post-project I tin see stains from berries and other leafage, and when scrubbing them, some of the stains go away, but non all of them.
Information technology would also help protect confronting fading.
Look for an outdoor concrete or stone sealer.
And be sure y'all exercise a exam patch first to make sure it doesn't change the color or darken the concrete stones in any undesired way.
Here are two other fun tutorials where I used concrete to make a rock shaped planter and also to make a rock shaped planter.
If you want to make your own stone that's personalized, consider adding decorative elements to the top. Items you tin can embed would be:
- sea glass
- pebble mosaic
- glass beads
- mosaic tiles
- pieces of prc
FAQ for Making DIY Concrete Stepping Stones
How thick do stepping stones need to be?
For immovability, concrete stepping stones should be 1 ½" to ii ½" thick.
Even so, you lot volition need to brand sure the mix you utilise tin cast to a thickness between those two numbers. Near mixes will support casting to a thickness of 1 ½", merely 2" is amend.
The information on the purse of the concrete mix should provide this information, simply if non, yous can usually discover that data on the manufacturer's website.
Just look under the general instructions or the Data Sheet.
How do yous mix a stepping stone?
When it comes to mixing concrete for a stepping rock, ideally y'all mix it with a rotating physical mixer.
But most of usa don't have one of those laying around and they are pricey to purchase for a one time job.
So the next nearly efficient way of mixing the concrete mix is to utilise a bucket and a drill with a special concrete mixing bit.
Otherwise, good ole fashioned mitt mixing with a hoe and wide bin volition work.
How practice yous make large stepping stones?
In that location's not really anything extra to do to make large stepping stones. The virtually important thing is simply to make certain y'all have the proper concrete mix.
You need a mix that allows for the largest size stone you plan to make and can run into the thickness yous need.
For these natural looking stones, I went as large as 3' x 2 ½' and a max of two" thick.
The Sand Topping Mix I used was specified for these sizes and thicknesses.
What kind of concrete do you use to make stepping stones?
The all-time concrete mix to use for path stones will be based on the thickness and size. The three types of mixes yous tin can use are:
GFRC mix that contains fiberglass fibers, for reinforcement
Sand Topping Mix from Quikrete
Crack-resistant- fiber reinforced, this can contain either fiberglass or nylon fibers
Should I seal a stepping rock?
I definitely recommend sealing a stepping stone. Concrete is porous and is susceptible to stains similar leaf stains.
The sealer will assistance forestall some of it and also brand it easier to remove.
If y'all exercise end up with foliage stains, a pressure washer and some OxiClean, or perhaps tsp will help remove them.
Don't forget to Pivot it for later!
Agile Time 2 days
Full Time 2 days
Difficulty Moderate
Materials
- Sand topping mix- Quikrete
- Vinyl straps for the mold
- Concrete pigment
Tools
- Please refer to the Full materials list above the tutorial steps.
Instructions
- Prep The Pathway Surface area
- Create The Stepping Rock Mold With The Straps
- Mix The Concrete
- Bandage The Concrete Stepping Stone Molds
- Add Color To The Concrete's Base Layer
- Fine Melody The Shape Past Molding It With Your Easily And Fix For Emphasis Coloring For The Physical Stepping Stones
- Now Color The Conrete'due south Top Layer For The Artistic/Accent Coloring
- Add together A Stone Texture To The Concrete With The Plastic Bag
- Let The Concrete Cure
- Seal The Concrete Stones -Recommended

How To Make Exposed Aggregate Stepping Stones,
Source: https://artsyprettyplants.com/diy-concrete-stepping-stones-look-natural/
Posted by: wellswelved77.blogspot.com
0 Response to "How To Make Exposed Aggregate Stepping Stones"
Post a Comment